
This tutorial will assume that you will using the audio editing software called audacity. Versions exist for the Mac and for Windows computers. You can download it from
https://www.audacityteam.org/download/
After you have installed it organize your music file and your narration clips in the same folder on your laptop. To create your audio narration clips follow the tutorial on this Web site to create a words-only meditation file. Make sure your give your narration files meaningful names. On a Windows computer you should be able to transfer the audio files from your phone to your laptop by plugging a charging cable into the phone and then connecting the other end to one of your laptop’s USB ports. On the phone you might need to watch for a popup message requiring you to give permission for file transfer. Click on the option to allow “File Transfer / Android Auto”.
You can now use the Windows file explorer to find your narration files on your phone. By default Smart Recorder puts your audio files in a sub-directory of the folder DCIM. Click on DCIM and your screen will look like this:
Click on the SmartRecorder folder. You can now click and drag your narration files from your phone to your laptop.
When you have your meditation music file and the narration files in a folder on your laptop start up Audacity. To start audacity click in the Search Box in the bottom left corner of your Windows laptop.
Type the word Audacity to execute the software.
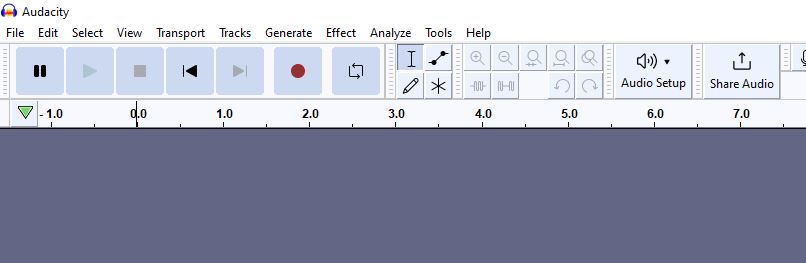
When you start audacity your screen will look like this:
The first thing we need to do is to add some audio files for us to edit. The first one we will add in this example is the music file which lasts the fill ten minutes of the intended meditation time. To follow this tutorial it would be useful to pick a music file that already has the same length in minutes as your intended meditation. Now using the Audacity main menu make these selections:
File –> Import –> Audio
Browse to the folder where your music file. Highlight your music file and click the “Open” button.
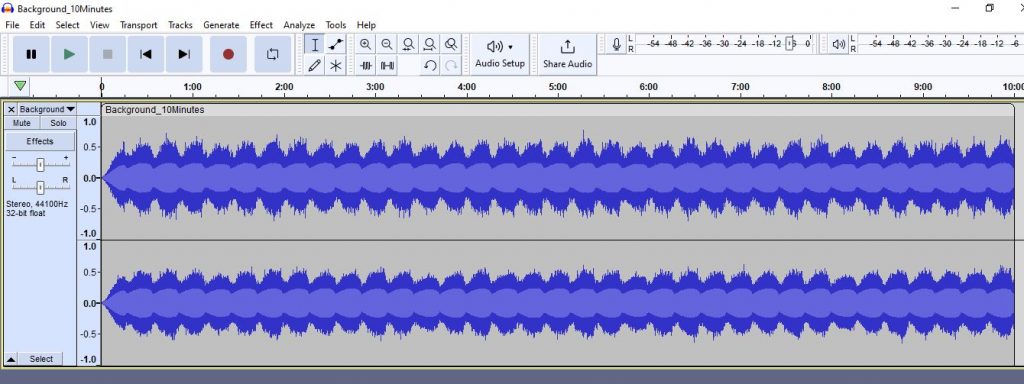
Your screen will look something like this:
Now we are going to add the narration file that starts the meditation. Again select:
File –> Import –> Audio
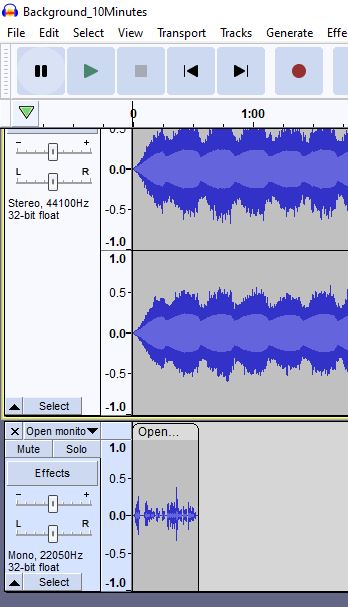
This time pick the narration file that starts the meditation. Now you will notice that you have two separate audio tracks in view:
The music track is on the top and your spoken words are on the bottom. At this point you will notice that the blue sound wave patterns for the music track on the top are bigger and wider than the audio narration at the bottom. This should give you a clue that the music track might be so loud that it will drown out the narration content of the bottom track. You can confirm this blick clicking the green play button and letting both tracks play at the same time for 20 seconds. The play button is the second icon from the left on the image below.
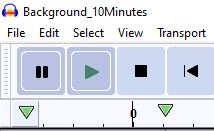
To prevent the music track from drowning out the narration we need to adjust the music track’s volume level. To do this we are going to select the envelope tool which is shown at the top right of the image below:

Next we are going to create click our mouse in the music track area where we want the volume level to change. First click the “stop” button to the right of play button. Next click in the music track at a suitable place. In the example below you will see three sets of white squares where the volume level can be adjusted. An example of how this looks is shown below:
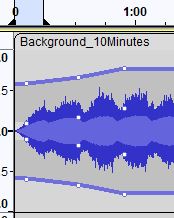
Now you can click and drag these markers to adjust the volume level. In the example below. The music track is almost muted until the word track ends. The tracks now look like this:
Now if you press the play button you will find the narration is loud enough to understand and the music track rises to its normal volume level after the words end.
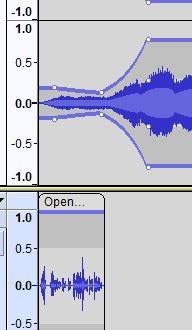
There is a segment of the word narration that comes at the end of the meditation. Again add it to your project with the commands:
File –> Import –> Audio
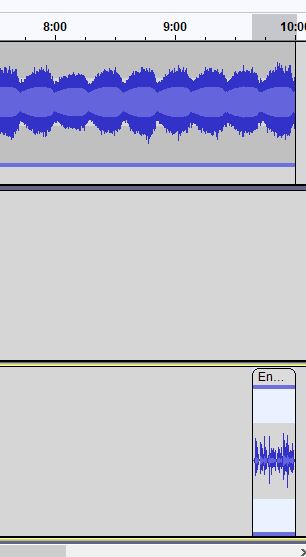
Now your screen looks like this with three audio tracks:
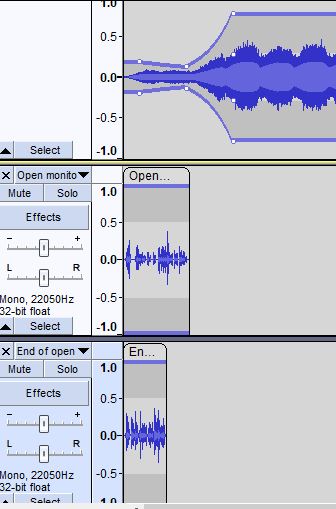
Then bottom track is the end of meditation narration so it is in the wrong place. To move it click “Select” from the main menu and hover your mouse over the title of the bottom click so that the cursor changes from an arrow to a hand icon. You can now move the bottom track to the end of the project by clicking and dragging it.
When you get it close to the end a yellow guide line will appear showing you that the right hand edge of the bottom narration track is aligned with the right hand edge of the music track. The ending section of your project will look like this:
You may need to adjust the volume levels again (by using the envelope tool as we did for the start of the project).
Now you are ready to merge the three tracks into one music file by exporting your project. Click on
File –> Export
Export it as an MP3 file and then click “Save”. Audacity will take a few seconds to create the merged file. Your meditation file is now ready to play.